Sunday, February 28, 2016

Craft Desk Project - Finished!

It took four months of my life but it came out great!  Only having weekends and some nights along with material delays made it drag on but the finished project came out better than I imagined!  Almost, (yes almost) makes me want to continue on with the rest of the house!

Theater Wrap Chalk Paint
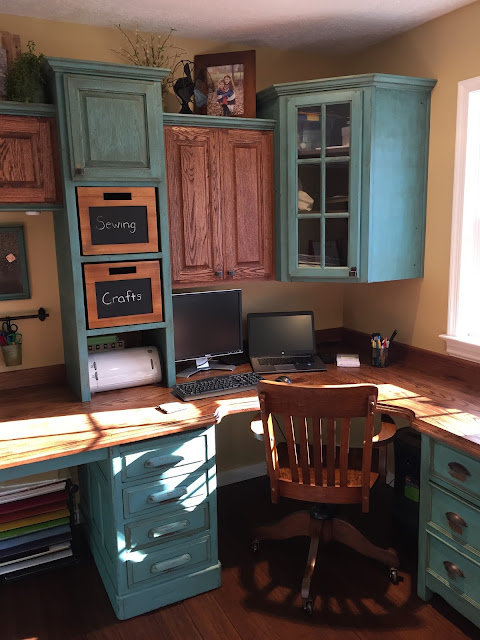
The finished product!  We have a great spot in the corner which serves as the computer workstation along with desk space on the right.  On the left is a 32" deep craft work space flanked with bookshelf cabinets containing some chalkboard front boxes.  The oak office chair was actually a junkyard fine and restored beautifully and fits in this desk perfectly.

Craft Desk
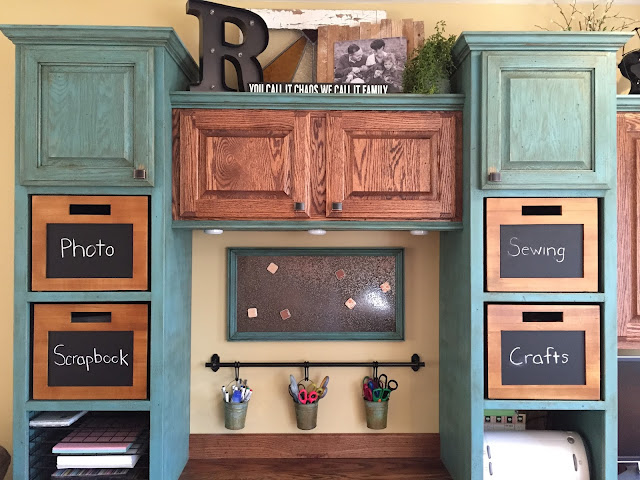
The frame is made from a piece of sheet metal painted (to hold magnets) with hammered finish spray paint.  The accessory bar is an IKEA find.  

Antique Chair Theater Wrap Chalk Paint
Cozy corner

Theater Wrap Chalk Paint Scrapbook center
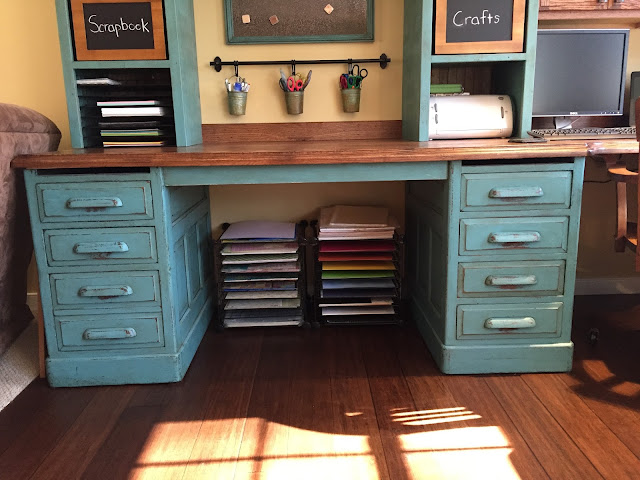
Paper is kept in a grid system.  For now its on the floor under the work space.  Its plenty deep and isn't in the way.  Future plans are the add an island work area.

Theater Wrap Chalk Paint Scrapbook center
Office work area.  Dresser fits perfectly.

Theater Wrap Chalk Paint Scrapbook center
Behind the dresser, I had room to add a little wrapping paper storage cubby.  Note the distressed leafy trim piece I had laying around.

Theater Wrap Chalk Paint
A little above the cabinet decor.  Stained glass window pane has been in my shed for 10 years.  Oh and look at that cool little frame I made from some more of that lathe.  Actually got the idea from a frame at Hobby Lobby.

Theater Wrap Chalk Paint Scrapbook center
A little more above cabinet decor.  I bought that old fan probably 12 years ago.  And that's a painted mason jar.  Check out those cute girls!


Theater Wrap Chalk Paint Scrapbook center
One last shot!


Craft Desk Project - Upper cabinets

The upper cabinets were the most work.  My anchor cabinet was this great corner cabinet I found on Craigslist.  It was a nice dark cherry stained kitchen cabinet with a glass door.  I then had to build from scratch bookshelf cabinets.  I then cheated and bought two unfinished oak cabinets at Lowe's to fill in the spaces between the bookshelves and corner cab.  Since the doors on the Lowe's cabs were boring flat panels, and I needed doors for the bookshelves, I custom ordered oak raised panel doors from a seller on Ebay.
Corner cabinet I found on Craigslist

Painted up

Gorgeous glass panel door

Book shelf sides with shelf guides routed in

Gluing the bookshelf fronts

Assembling the book shelves

Bookshelves assembled.  

Note the distressed wood in the back.  Its actually old lathe that I pulled out of one the homes I renovated several years earlier.  I kept all the lathe for use in projects.

Final gluing of the bookshelf

A coat of stain on the front so dark color shows through after distressing.

Painted up

Those dam worms!
Finished up and ready to install

Bridge cabinet from Lowes with the boring flat panel door

24" cabinet stained Red Oak.


Bookshelves and corner cabinet in place.  In order for everything to fit together, I had to trim the corner cabinet on the right side and also cut out the drywall.  This would allow my 24" cabinet to fit!

All cabinets hung!  Note the criket machine on the right.  I had to make sure it fit!

Inside of bookshelf painted with lathe.

Now we are coming together!  Note the LED lights mounted under bridge cabinet.  Switch located under counter in corner seating area.

Used base cap as a light rail painted to match

Just about done!  Waiting on the doors!

Used some more of my oak to make back splashes.

Craft Desk Build - Counter Top

For the counter top I decided to go with an aged oak stain color with some light distressing.  It helped tremendously on the cost by using some raw oak that I had bought over 10 years ago for some projects I had building our last house.  I still had a ton of 1x4 and 1x6 rough sawn oak.  It took some work to plane down and glue together but it came out great!

I started out with 3/4 plywood base for the countertop

I left a gap on the lip of the perimeter to allow for an oak strip to be installed for finishing off the edge

I cut my pattern in the corner where the chair would go.

Some of the rough sawn oak brought inside to acclimate to the house

My handy Dewalt planer up to the task

Dryfitting the newly planed and edged boards

Made a Herringbone pattern in the corner

More dry fitting of the boards

Gluing the top

Top was glued in sections.  Had to be careful that it wasn't bowing while clamped.

Top sections in place but not yet permanently.  This was just to glue in the bottom oak strip for the edging.

Speaking of edging, this is the router bit used.  A cove roundover.

Made a heckuva nice edge.

Top getting insatlled

Edges look good!

Now the hard part.  Routing the curved section.  Had to do that after counter was installed so this section was routed in the room.  Made quite a mess!

But it came out pretty good!


My nice new top and what was the next step?  Distressing!

I used a blow torch to burn some dark blotches to emulate years of stains in the wood

I used a chisel to gouge in some scratches, a homemade tool to make work holes and a bolt for some other distressed marks.

That oak wook sure had a worm problem!

Here is the deadly tool I made to make my worm holes!  

All stained up and sealed!